Although I woke up a little later than I wanted to, I managed to make it to Arches National Park in time for sunrise – 6:14 AM. As I entered the park, it was bathed in a pre-dawn glow. On this trip, I have seen the Grand Canyon, Horseshoe Bend, and other wonders. I am not sure whether it was the light on this particular day, the fact that I was still a little groggy, the physical proximity to the immense features, or the difference between my expectations and the reality of the experience, but I was more moved today than I have been at the other parks.
There are words like incredible, awesome, stunning, breath-taking, but none of them seem adequate to express the feelings evoked in that short drive.
Today my goal was to take pictures at dawn from the North Window Arch. When I arrived there, I discovered that many people had the same idea. Here are the people waiting for dawn.
Here is what they saw.
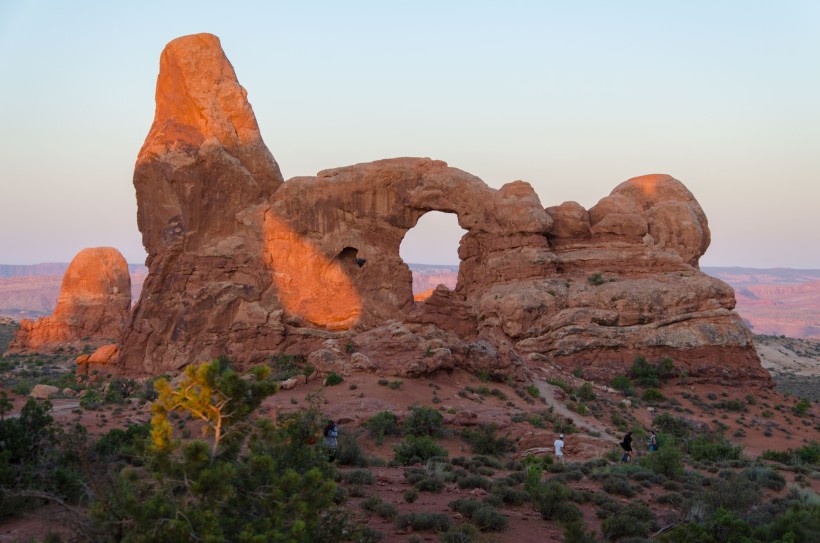
Looking to the west, from the same vantage point, one sees early-light on Turret Arch.
Later in the morning, Turret Arch basked under the full illumination of the sun. This image was taken from a vantage point a little closer to Turret Arch.
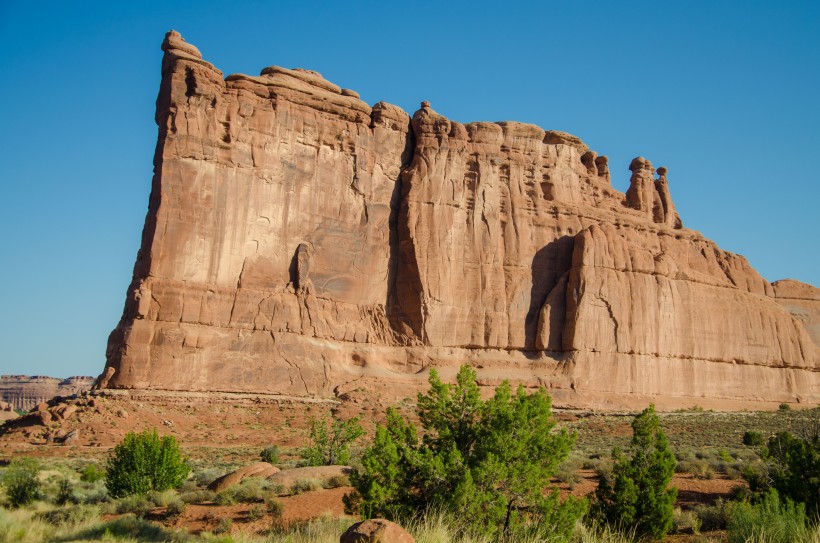
Here is an image of Balanced Rock and Tower of Babel observed on the way out of the park.
Tomorrow I will return to Arches on my journey to Grand Junction, CO. Here is un-edited time-lapse of dawn light on Turret Arch. This will not only give you an idea of the varying illumination but also of the people present at dawn. Perhaps spring would be a better time to visit for two reasons. First dawn is later in the day, and second, there are fewer people around.
Today, I got an early start to drive from Sedona to the Grand Canyon. I arrived there about 6:30 am. This was significantly after sunrise, but before the park began to become too filled up with visitors. This was the first chance to use my National Park Annual pass. It saved me $30.
No pictures can do justice to the vast expanse of the Grand Canyon. I am posting some panoramas of the area and an interesting tree framed by the Canyon.
GPS Tracks
Here is a short video showing a panoramic view from Mather Point at the Grand Canyon.
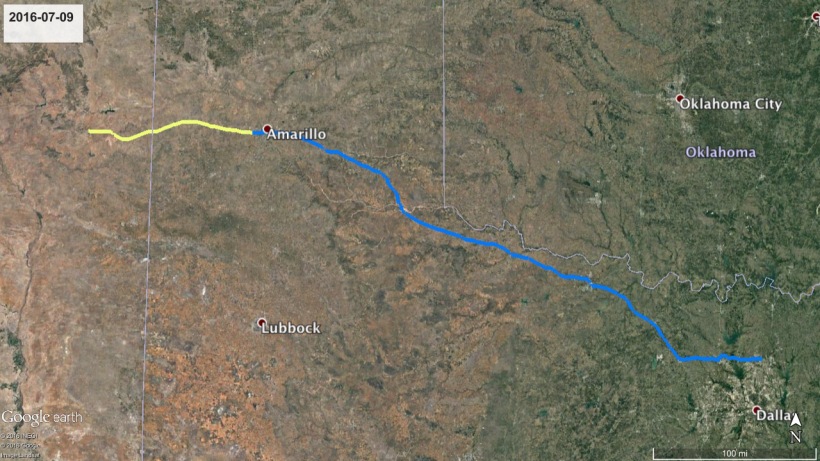
I filled the car up with gas, had the car washed, and got off to a moderately early start. Morning driving is the easiest with the sun at my back. I hit my lowest gas price of the trip so far at $1.87 /gallon in west Texas.
Just west of Amarillo Texas, there is Cadillac Ranch which displays half-buried Cadillacs which passersby can spray paint. The ranch is just south of I-40 and there were at least 50 people visiting when I arrived in the early afternoon. Here are some pictures.
Empty spray cans litter the site, but given the number of visitors, these must be removed daily.
A young kid gets into the act.
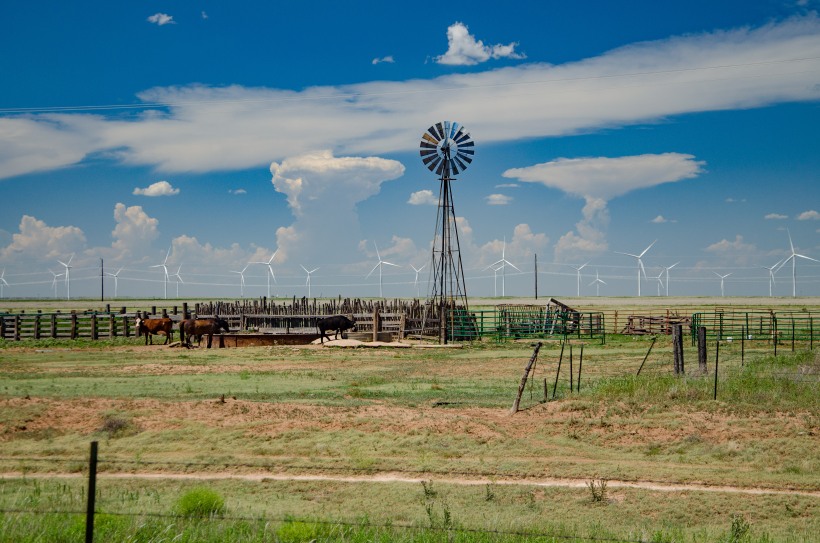
West of Amarillo and north of I-40 there must have been about 20 miles worth of wind turbines visible from the interstate. I noticed this juxtaposition of old and new wind power. I pulled over at a picnic area to take this photograph. The clouds are as interesting as the wind turbines.
Greeted to New Mexico with 102F heat.
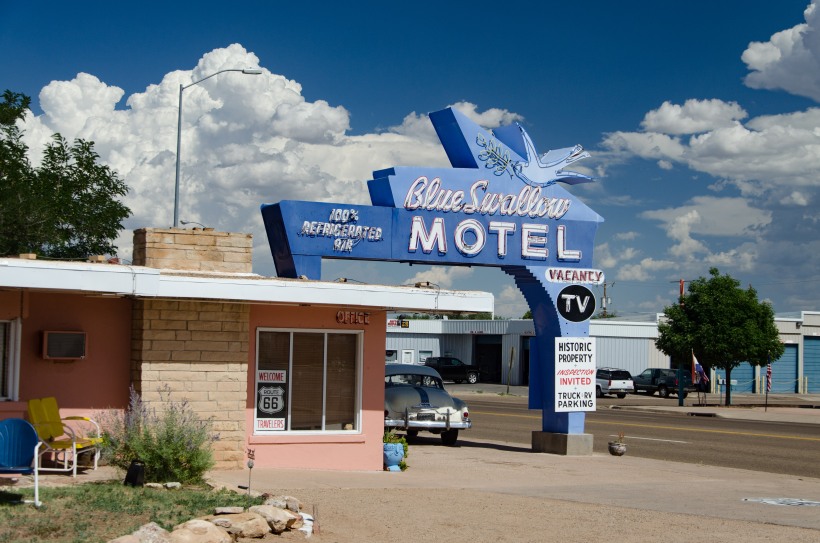
I am spending the night at the Blue Swallow Motel, a landmark on old Route 66. There is a vintage car parked outside to remind you of the era reminiscent of the 1950s and 1960s. The rooms are done in the decor of the 1960’s down to the rotatory phones and issues of National Geographic. The hotel concedes to modernity with a flat panel TV and free wi-fi.
When you arrive, one of the family that owns the motel even takes you to the room to show you the amenities.
There is a small garage to house your car adjacent to your room. My room is to the left of the garage.
The owners of the Blue Swallow recommended Del’s Restaurant. The service was excellent, but the food was more akin to a Denny’s than an upscale restaurant. Nonetheless, prices were reasonable. I am not sure what to expect in a small town off of I-40
Time lapse of an evening at the Blue Swallow Motel.
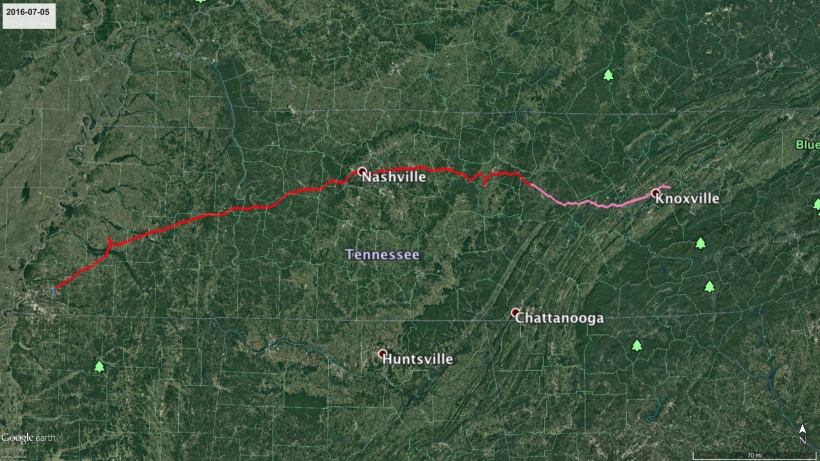
This morning, I got to sleep in a little, and did not hit the road until about 9:00 am. It was a rainy day with periods of sunniness accompanied with oppressive humidity. It was my plan to go to Burgess State Park to see Burgess Falls. Fortunately, the rain let up enough and I was able to walk the muddy 3/4 of a mile to the largest falls. I could not take pictures from a lower level because the path was washed out in a recent storm.
Burgess Falls
Sweating from the humidity of the hike.
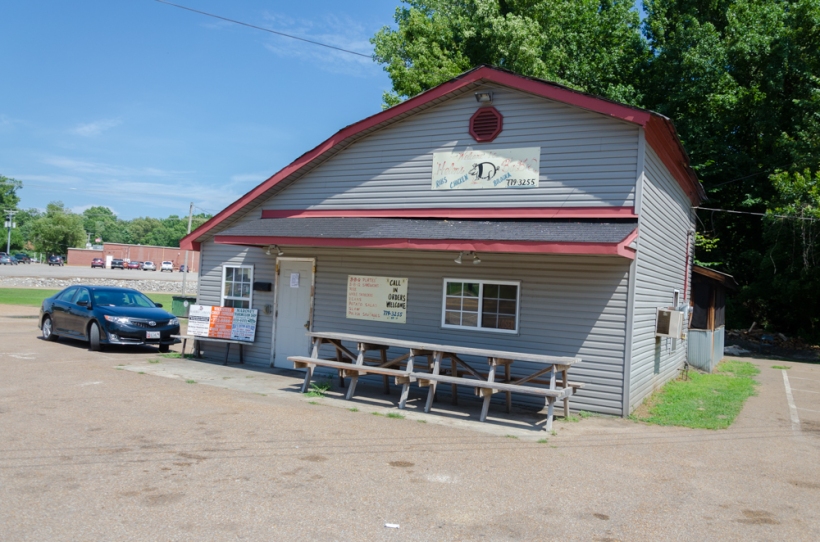
My second goal for the day was to eat ribs at Helen’s Barbecue in Brownsville TN. It is a small place with a large reputation.
Helen’s Barbecue
It looked empty when I arrived and I saw this sign on the door.
The note must have been written quickly because the day and year are correct, but the month is wrong. At least I hope that the message was not put up a month ago.
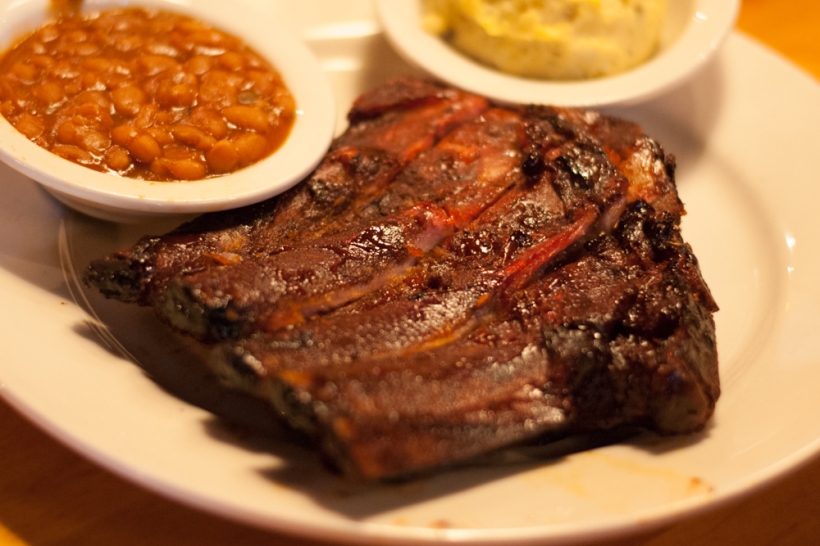
A little frustrated and with my mouth watering for ribs, I drove straight to my motel in Memphis. A little inquiry at the front desk persuaded me to go to Jim and Nick’s to have this plate of ribs.
I make a habit of carryong a small GPS receiver with me on trips. Recently, I have been able to embed these GPS tracks into Google Earth and represent the trip as as a video with a small marker showing the path. Below is an example, showing the first day of a two-day trip to Texas, that ended in Memphis. Note that when the arrow stops and jiggles around, it usually marks a place where I stopped
The key to doing this is to first download GPSBabelwhich converts between various GPS data files. A GPX file is the most common format, but my GPS receiver produces .CSV files. GPSBabel will convert either one of these to Google Earth KML files, using a graphical interface. The alternative command line for this would look something like this:
where you would substitute in the appropriate file names within the square brackets.
I zip the KML file to KMZ to reduce the file size using:
zip [KML file] [KMZ file]
When this KML or KMZ file file is displayed in Google Earth, look at the side bar and you will see “waypoints” and “trackpoint” subfolders. Un-check the “waypoints” folder. Look inside the “trackpoints” folder and you will see an arrow icon and another folder icon. Un-check this folder icon. That folder contains all the text labeling the track points and that will just slow down Google Earth.
Now look at the upper left-hand corner of the Google Earth display area. There are two movable icons on the slide bar (a concave icon and a house-shaped icon). Move the icon on the left (concave) to the far left. Then move the larger icon (house-shaped) near it on the left. Above the slide bar, there are some more small icons. The one that looks like a small clock with a right-pointing arrow will start the trip arrow icon moving on the track. The wrench to right and above the slide bar will allow you to control the things like the speed of the playback.
I could not figure out a direct way to save this a video file from Google Earth. I then used QuickTime (on a Mac) to save a screen video in a MOV file. This is usually a large file. Use the free program Handbrake to convert this to a MP4 file. Change the number of pixels to match a conventional format (e.g., 1920 x 1080 for HD). This will generally reduce the file size.
I have owned a GPS receiver of one sort or another since 2000. Anyone with a smart phone does so now. However, I prefer to carry a small separate receiver for a few purposes. First, new, small, GPS receivers have high sensitivity. They will often maintain a lock on the satellites, when more conventional GPS receivers in phones fail. Second, it is easy to pull these data off and create Google Earth maps of trips. Third, most digital single-lens reflex cameras (DSLRs) do not carry GPS receivers. I can easily compare the GPS data with the time tag in my photos and embed the location in the image files. This functionality occurs automatically on pictures from smart phones. I still prefer the photographic flexibility of DSLRs, but want to include GPS information in the image files.
Last summer I traveled to Milan and Lake Como. To give you an idea of why I like creating GPS tracks on Google Earth, here is such an image.
GPS track of boat trip from Como to Bellagio and back. The green track represents the outgoing trip. The red track represents the return trip.
Within Google Earth, one can zoom in and help recreate the trip.
Below is a picture of my GPS receiver (on the right). You can gauge its size by the keyboard. The receiver stores the data on a microSD card, and it is charged with USB port. I can usually get about 18 hours of tracking per charge. Track points are recorded about once a second, but the receiver will suspend recording if you don’t move for a while. It will resume recording once you start moving again. I literally just toss the receiver in one of the pockets of my camera bag and forget about it until I want to use the data. I recharge nightly.
At the end of the day or trip, I pull out the microSD card and copy the recorded GPS data files onto my computer. The files have a .CSV extension. Using the free GPSBabelfor OSX or Windows, one can convert these data into a variety of different formats. GPSBabel has both a graphical user interface and a command line interface.
I convert each GPS receiver file to a .kmz file for Google Earth and a .gpx (GPS exchange) file, which is a defacto standard. The contents of a .gpx file look something like this for each track point
where elevation is in meters and speed in meters per second.
Then I use another free program, available for OSX or Windows, exiftool. I provide the .gpx file and the directory name of photos in JPEG or RAW format. The exiftool will look at the time in the camera file and the times in the .gpx file and write the appropriate longitude and latitude in the image files. This location will follow the file even if it gets separated from the original image collection.
For those so inclined, here is a sample command line (for OSX) for using the exiftool to embed locations in image files
exiftool -geotag trk.gpx '-geotime<${DateTimeOriginal}+00:00' dir
wheretrk.gpxis the .gpx file and diris the directory containing the images to be processed. Note that the geotime is set for UTC assuming the images were all time tagged with UTC. This parameter can be changed to deal with other time zones. I avoid this complication by always keeping my camera time set to UTC
For less adventurous types, Aperture and Lightroom will also allow you to put automatically the location data from the .gpx files into the photographs.